
Bullet Seating Die Adjustment & Creating a Dummy Round
In this section I will discuss bullet seating die adjustment and measuring your cartridge to make sure the round is within specification. Additionally, I will also show you how to use the RCBS bullet puller. If you’ve been following this series from the beginning you will know that I’m reloading for 223/556 and be using a taper crimp die. I adjust my dies so a slight crimp is applied, as described below.
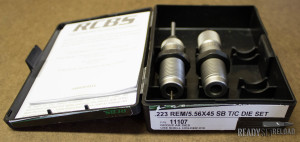
223/556 RCBS SB T/C Dies
When my seating die needs adjustment I always use a dummy round instead of a live round. A dummy round is basically a piece of prepped brass without a primer or powder. The reason I do this is that when you seat the bullet there is a good chance you will need to use a bullet puller if you seat the bullet too deep. Having no powder or primer in the brass makes things easier during this process.
Like I mentioned in previous posts, you can use the official RCBS reloading die manual or you can use the steps that I’ve outlined below:
- Place a piece of prepared brass in the shell holder which is installed on the ram of your press.
- Raise the ram of the press (with the brass) all the way to the top.
- Screw seating die all the way down until you feel a slight resistance. The resistance is caused by the taper crimp shoulder in the die hitting the mouth of the brass.
- Lower the ram (with the brass) and insert a bullet into the mouth of the brass.
- Raise the ram of the press (with the brass/bullet) into the seating die to get the bullet seated part of the way into the case mouth.
- Repeat step #5 adjusting the bullet seat plug in small increments until the COAL (cartridge over all length) is your desired length. If using magazine fed rifles like an AR-15 make sure your OAL is short enough for the round to fit in the magazine!
NOTE: Ask discussed in earlier posts, use the Lyman Reloading Handbook to find the COAL. For 223/556 Remington this is 2.260″ - Unscrew the bullet seat plug a few turns to prevent it from contacting the bullet as you adjust the seating die for crimping.
- Loosen the die lock ring and raise the ram (with the brass/bullet) into the seating die.
- Screw the die down into the mouth of the case until you feel a slight resistance like in step #3.
- Continue the screw the die down until you feel a firm resistance. Use only finger pressure; no tools!
NOTE: If you seat the bullet down too far scroll down for instructions on how to use the bullet puller. - Taper crimps should be measured. The taper crimp angle is shallow, so you may not be able to see the amount of crimp being applied. Using the fine blade section of your calipers, measure the round near the base of where the bullet is seated in the case neck. Then measure the case neck right at the case mouth. The case mouth measurement should be .001″-.002″ smaller in diameter. Adjust the die until down 1/8 of a turn until you get this measurement.
- After you are satisfied with the crimp, set the die lock ring and raise the ram (with the brass/bullet) into the seating die. Screw the bullet seat plug down down until it touches the bullet and tighten the lock nut.
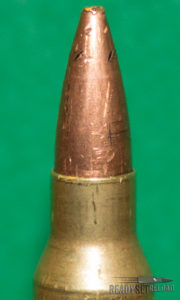
Light Taper Crimp
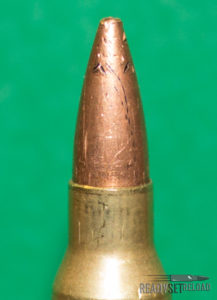
Medium Taper Crimp
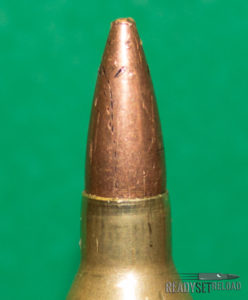
Heavy Taper Crimp
As long as you trim your brass to the same length each time you shouldn’t need to readjust your die the next time you use it. Now, if you seat the bullet too deep you can use the RCBS bullet puller to yank out the bullet and give it another go. The bullet puller model that I purchased didn’t come with any collet’s so you will need to purchase those separately for your caliber. You can use the official RCBS bullet puller instructions or you can use mine below:
- Insert the bullet puller with collet into the press.
- Make sure there is no tension on the collet. If there is, turn the handle counter clockwise so the tension is released and the bullet can enter the collet freely.
- Insert the round into the shell holder of the press and raise the loaded cartridge into the collet.
- Turn the handle clockwise; applying tension on the collet & bullet.
- Lower the ram (with the loaded cartridge) sharply and the bullet should be pulled from the case.
NOTE: In my experience, it takes a couple tries to get the bullet removed. This is one of the reasons I use a dummy round so multiple bullets don’t get marred up.
In the next section we will put everything you’ve learned together and create loaded ammunition. Almost there!
Equipment used in this post:
