
How to use Calipers
In this section I will talk about how to use calipers; both digital and analog. I researched these a fair amount knowing that cheap measuring tools are junk and will likely provide inconsistent readings over time. I also knew that I wanted to buy a set of digital calipers and analog calipers. The thought here was I could use the digital set most of the time and use the analog set to double check accuracy of the digital readings. The analog set would also serve as a backup in case the battery died in the digital set.
I started my research at the big online stores like Midway, Brownells, etc. After some investigation I noticed that many calipers made by people like Hornady, RCBS, etc. are assembled overseas, likely China. I realized that calipers aren’t specific to reloading so I started looking at other places like Sears, Lowes, etc. In the end, Amazon ended up providing me the best information because of customer reviews.
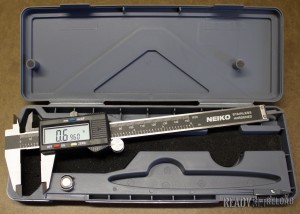
Neiko Digital Caliper
Amazon has a ton of different calipers ranging from <$10 to over $12,000. Yes, you read that right $12,000. Obviously, I went with cheaper models and my decision was based purely on customer reviews. You can see the calipers that I picked (along with the $12,000 set) via links at the end of this post. I’ve had no issues with either set that I own.
First, I will explain how to use the digital set:
- Push the red button to turn on
- Extend jaws and then bring them back together
- Push the yellow button to zero
- Extend jaws then bring them back together; make sure the display reads 0.0000. Zero again if necessary and repeat.
- Extend jaws across object you wish to measure
- Record measurement
This set also features a button that can be pushed to convert between millimeters and inches. You will want to keep this on inches for reloading. It also has a locking nut which is a great for trimming brass; more on this in the next post. Lastly, it comes with an extra battery in the case which was a nice surprise.
Now, I’ll explain how to use the analog set:
- Extend the jaws and then bring them back together
- Inspect the dial to make sure its at 0. If not, loosen the 6:00 nut and turn the dial until the pins are on 0. Tighten the 6:00 nut.
- Extend jaws then bring them back together; make sure dial reads 0. Repeat step 2 if necessary.
- Extend the jaws across the object you wish to measure.
- Record measurement
A little practice is required to read the measurements displayed on analog calipers. When the jaws are extended across the object you wish to measure you will notice that two sets of numbers are exposed on the top and bottom of the beam. The top set is millimeters and the bottom is inches. Inches are what you will be focused on for reloading. They are

Anytime Tools Caliper
the bigger numbers broken apart by smaller numbers which indicate tenths of an inch. Whatever is visible on the beam is your whole number followed by the smaller number which is in the tenths place. Example: Large 3 small 6 = 3.6″. To get the hundredths and thousands places you will need to look on the dial. The red inner ring indicates millimeters while the black outer ring indicates the inches. There are also two colored pins which correspond to millimeters and inches. Again, we will be using the black set of numbers and pins for reloading since everything is in inches. If the black pin is halfway between 80 and 90 then your hundredths and thousands places would be 85. So, you final reading would be 3.685″. If it sounds confusing it is at first. Watch the video below and it will make sense.
One other note on these calipers. The locking nut at 1:00 is to lock the calipers in a set position, which works really well for trimming brass as explained better in the above video.
I don’t see any markings on either set of calipers indicating where they were made. My best guess is China. However, I’ve had no problems with them and my experience with them aligns with the customer reviews on Amazon.
In the next section I’ll discuss the case trimmer and brass trimming step.
Links to equipment discussed in this section:
